Lifestyle blog written by Tanner Mathewson

Monday, May 27, 2019

How to Plan a Wedding That You're Proud Of: On a Budget


In honor of our 2 year wedding anniversary, and the fact that it is now officially wedding season, I decided to give you guys details about how we planned our wedding on a budget! Not every little thing will necessarily work out the same for you as it did us, but that's what's fun about it- it's such a rewarding challenge for each individual couple. If you have an endless wedding budget I am jealous, and please feel free to click out of this right away. I'm not bitter or anything.


We got engaged at the end of December 2016 and were married on May 20th, 2017. I'm a psychopath, I'm aware. I was just so excited to get the show on the road that I (we) planned the whole thing in 5 months. Honestly, I wouldn't do it any other way. What I learned about wedding planning is that it's basically just making a lot of big decision and not looking back. 


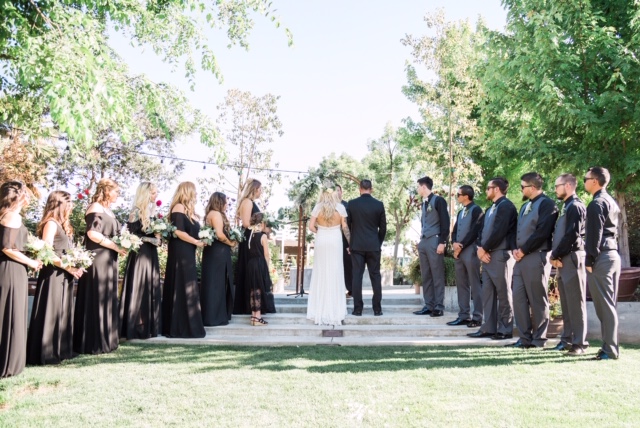
1. First things first: decide what type of guest list you can afford.

This is one of the most difficult decisions to make, but it is so crucial for your budget. Having a 300 person wedding would have been an absolute blast but we would have had to cut costs so much everywhere else. Instead, we wrote down our immediate family, then our bridal party, then extended family, then coworkers, and then any extra friends that we were able to invite. With our budget we were able to invite 140 people. It was so tough, and I do constantly think of people here and there that I wish we could have had there, but at the end of the day we had to do what we had to do. I like to think that most people understand these days what goes into a wedding financially and tend to be more understanding. Honestly, if they're not understanding people they probably shouldn't be invited LOL. 

Tips: 

-I work in a salon of 20 + women, and I love them all! Unfortunately if we had given them all a plus one, that would have been over a quarter of our guest list. Instead, I did a large invite to the whole salon saying"I'm sorry, no plus ones- enjoy girl's night out!" Tacky? I don't care. Gotta do what you've gotta do. 

- We also said no kids, other than infants or those in the bridal party. People don't understand that an extra seat is an extra meal, no matter what their age. Again, people get it and should be understanding. I don't hate your kids. I love kids. I'm on a budget. Instead of writing "no kids" on the invite, we had a section that said how many seats we were offering for that family. 
Example: 
___ out of    2    will be attending

___ out of   2   decline


2. Decide what your overall budget is.

Blake and I worked our asses off for 5 months to pay for this wedding, and it was worth every penny. We weren't in a position to ask our parents to pay for the entire thing, so we asked them if there was anything they would be willing/able to contribute. We are forever so grateful for everything our mothers/fathers gave us. It would not have been anything close to what it was without their help. It helped knowing right off the bat what we were going to have to come up with on our own. Keep in mind most venues require a deposit, but after that you can make payments. Same with most of the other vendors. 


3. Prioritize.

Make a list from top to bottom of what is most important to you. Whatever is at the top is where most of your money will go, and whatever is at the bottom you can either eliminate or get creative. For example, mine went a little like this:

Venue
Photography
Florals
Decor
Dress
Food/Cake
DJ
Bar
Hair & Makeup
Videographer
Transportation

Now, don't get me wrong: the things at the bottom of the list weren't unimportant to me- I just either had the hookup on these things or I had something that was a bigger priority. For example: hair and makeup were gifted to me from my close friends. My videographer was something I wanted but couldn't fit in along with the photographer. We ended up finding a high school student who did it for the experience. Get creative! I would have loved to go from place to place in a limo but our venue was in town so it wasn't a priority. We ended up taking an Uber XL after with all of our friends and it was a BLAST, the driver had lights and everything. 

My list can look very different from your list, and that's okay! It's just the idea of writing your priorities out in front of you that helps you visualize where you want to spend more.


4. Think outside the box.

By box, I mean traditional wedding box. I'm all for tradition in some aspects, but in others I say throw it out the window. 
We had a food truck, Quesadilla Gorilla, for our dinner. It was SO delicious and it was literally less than half the price of any other caterer in town. A nice four course meal would have been amazing, but it just wasn't an option for us. This also gave our wedding a little touch of our personality, in my opinion. 

Instead of having a traditional pastor, we had my step dad officiate. He's one of the greatest men I know, and it just felt so right having him marry us. It also saved us money on an officiant. 

We took the sample size of my dress, which gave us a discount and we didn't have to wait for it to come in. A family friend did the alterations. My shoes were from DSW. 

Cut corners where you can, and decide what details are important to you!


5. Let the venue set your vibe.

If you find a venue that you love, decor will be one of the things that you will spend the least amount of money on. I remember looking around once everything was set up and thinking "Wow, I didn't need half of this stuff." Don't get me wrong, I loved all of my decor. But between the lights, greenery, and florals? That would have been enough. Trust me, don't overdo it. Choose a few key pieces that you want and let the venue do the rest.


6. Borrow, borrow, BORROW!

How many people do you know that have gotten married, had a baby shower, or thrown some type of party recently? I guarantee that you know someone! We borrowed tall flower vases (one of my favorite details), cutlery, glass dishes, glasses, chargers, and more from close friends. I know that I've offered my decor to my clients and friends after the wedding- people hate to spend money on something that will never be used again. I guarantee if you ask around, people will be more than happy to let you borrow something.


7. DIY what you can, hire what you can't.

I knew I wanted a sitting area, I just couldn't justify paying $500 for a sign on Etsy. We asked our handy friends to make the sign out of wood, and then I hired a local calligraphy artist to paint it. The sign with the hash tag was less important so I did that myself! Also, those chairs were found by two of my close friends who just know my taste. One was $5 and the other was $30? I don't know. It could have been less. My friends know me too well, and these were perfect for our back drop. A lot of the decor was our home decor. Two birds, one stone.


And here's a picture of Blake crying. Because Blake cried. !!!


I hope I didn't forget anything major! I will list all of our amazing vendors below. As always, if you have any questions let me know! Feel free to comment or message me on Instagram!

Photography: @heavenlyrhoadesphotography
Venue: @thegardenstulare
Dress: @miabellacouture @miabellabridal
Hair: @hair_by_kimberly
Makeup: @moonchild_makeup
Cake: @royalty.sweets
Woodwork: @grainonthebrain
Calligraphy: @jolenespalette
Catering: @quesadillagorilla


lovelovelove, Tanner


Share:

Tuesday, May 21, 2019

6 Tips for Long, Healthy Hair


If you're looking for absolute scientific facts about hair growth, this is not the blog post for you. If you're looking for experience and tips from someone who has personally chopped her hair off and grown it back multiple times, then this is for you. I am the queen of impulsively deciding to CHOP IT OFF. I'm also currently a licensed hairdresser with a career who has seen several clients successfully growth their hair out from short and unhealthy to long and strong. This post is based on experience alone and what I have noticed over the years. I have seen methods that work great and methods that don't seem to make a difference.


The last time I chopped my hair off was about 7 years ago, when I was in beauty school. I was going to school 8 hours a day, then going straight to JCPenney to work a minimum of 6 hours. Basically, I was getting about 4 hours of sleep a night for almost 11 months. I strongly believe that most of us (who typically have long hair) chop our hair off when we are experiencing some extreme emotional change in our life. Chopping your hair off is almost like a rebirth. When we feel like we have lost control in one or several areas of our life, it's easy to control one major part of our identity: our hair. Struggling with body image? Short hair will make me feel so different and sexy. Breakup? Short hair will show him! Sleep deprivation? Hello, scissors. I'm not saying this is always the reason, because sometimes this is genuinely a good choice. I don't hate short hair AT ALL. But, sometimes the need for change is often taken out on the length of our hair.

This blog post is meant to help anyone trying to grow their hair out again, anyone that struggles from chemical damage, or anyone who feels like their hair always stops growing at a certain point.

It shouldn't have taken me 7 years to grow my back hair out again. Luckily for you all, I was my own guinea pig and figured out what works best. Hopefully my journey will give you all insight on how to speed up the process and keep your hair healthy in the long run.

Tip #1
Slow down on the color services

-If I had chosen to maintain my hair color throughout the growth process rather than change it drastically 3 times a year (at least), It would have taken me half the amount of time to reach my goal length. It takes a tremendous amount of self control, but bleach and color are not your friend when it comes to length. Nothing stresses me out more than when a client comes in every 6 weeks asking for their hair to be as blonde as possible, and then asks me why their hair won't grow. If you are not okay with a little bit of outgrowth, you will not have long hair. Plain and simple. My clients that are patient and come in every 3 months and are okay with a little definition in their root see so much more growth than those that come in every time they see dark on their root. If you want to be incredibly blonde with no outgrowth you will have to spend a lot of money on a lot of different haircare products. Same goes for clients that come in and change their color from dark to light regularly. You will not see progress, and if you do it won't last very long. Consistency and giving your hair a break is key. Take my cousin Sophia, for example. She used to bleach her hair consistently and it wouldn't grow past her shoulders. If it did, it was broken. Once we started highlighting only the top of her hair every few months, her hair really took off. Now, if she wants to be super blonde and have super long hair it will be easy.


Tip #2
Deep condition regularly

I saw a huge difference in the health of my hair when I started deep conditioning my hair once a week. I would always preach at home hair care to my clients, but was a total hypocrite in all honesty. When I started to practice what I preached, my hair changed completely. I can tell immediately when a client comes in who regularly deep conditions their hair. Deep conditioning at home regularly keeps your hair hydrated and strong. For those of you that feel like your hair only grows to a certain length and then breaks off, this is for you. If your ends are not hydrated, it doesn't matter how fast your hair grows. If they are brittle, they will break off. Same goes for my blondes out there. Long, blonde hair needs hydration to stay long.

Tip #3
Stop cutting your hair all the damn time !!!

I think my biggest pet peeve is the rumor that "cutting your hair makes it grow." Think about it. How on Earth can cutting the ends of your hair somehow activate something in your scalp to increase hair growth? It can't. The truth is that if you never trim your hair, you will get split ends. Split ends lead to breakage. If your ends are constantly breaking off, it will never growth past a certain length. The point of trimming it semi-regularly is to get rid of split ends or extremely damaged ends that have the potential to break off. So, stop getting your hair cut every month if you want it to grow out. Get it trimmed every few months and you will see more progress.

Tip #4
Use a heat protectant

Another thing that I learned after I finally started practicing what I preach: heat protectant works. If you are someone who blow dries, straightens, and curls their hair regularly, you need a heat protectant. I suggest one for when it's wet and one for when it's dry. Just do it. Heat depletes the health of your hair. 

Tip #5
Be gentle with your hair when it's wet

I cannot stress this enough. When you get out of the shower, the worst possible thing that you can do is rip through it with a hair brush. When your hair is wet it has less elasticity, which means it is way more likely to snap off when you brush it. When you get out of the shower,  wrap it in a towel or take as much moisture out of it as possible with the towel. Once it's not dripping wet, spray a detangler or leave in conditioner. After that has had time to sit in, go with with a wet brush. These brushes are magical, trust me. They are also super affordable so you have no excuse not to use one. When brushing your hair, always start from the ends and work your way up. Be very gentle, please. For the love of God, be gentle. It physically hurts me to watch people rip a brush through their hair. I honestly don't even brush it too much when it's wet, just enough to make sure that it's not knotted. When the hair is dry I brush through it completely and smooth it out. Be nice to your hair if you want it to grow, please. 

Tip #6
Use gentle hair ties

If you struggle with breakage around your face and at the nape of your neck, the problem could be your rubber bands. If you use regular rubber bands and if you wear your hair up in a ponytail or bun regularly, your hair is constantly having friction on its' most fragile strands. Try switching to a scrunchie or something softer. I also suggest sleeping with your hair in a braid or down, never in a bun.

Side Note: Vitamins

  • Vitamins are a great tool to increase the health of your hair or help with hair loss. Personally, I didn't see an increase with the speed of hair growth but I have definitely seen a difference when clients who have brittle hair have started taking them. Barefoot Blonde sent me some and they are super yummy! I also linked some on Amazon below this blog post.


I added a list of products from Amazon that will help with hair growth and health!

If you have any questions, feel free to ask!

lovelovelove,
Tanner

Share:

Monday, May 13, 2019

4 Different Ways to Wear Dirty Hair in a Bun

My go- to hairstyle during a typical work week is a bun, for obvious reasons. Between working out or just not having the energy to wash, blow dry, and style my hair on a daily basis these styles save me. I work in a salon where pretty much everyone is super put together and stylish on a daily basis, so as much as I would love to show up in my (usually) shameless ratchet attire, that's not really an option for me. 

I've tried to organize these styles on a scale of 1-4. Style number one being "Not too dirty" and style number four being "I should have washed my hair two days ago but I'm not going to." With all of these styles I've added some hoop earrings and fake lashes. Nothing distracts from unwashed hair better than accessories and some good makeup. 

I understand that my hair is relatively long and extremely thick, so it's pretty easy for me to get a giant bun. For those of you with thin and/or short hair, I would suggest throwing in a weft or two of extensions or adding a texture spray and backcombing your ponytail before you make a bun. Or all of the above. 


I started all of these styles with leftover messy curls. I prepped my root with some dry shampoo and my ends with some texture spray. If you would like a how- to on my go-to messy waves, I will link my tutorial here. 


Bun #1

1. Section out the pieces you would like to leave out. If you don't have any that are short enough, ask your stylist to cut some at your next appointment!


2. Pull hair into a high pony tail and secure with a rubber band.


3. Pull apart hair around the face and at the root for texture and volume. Don't be afraid to make it messy. If it feels too loose just tighten the rubber band and try adjusting again.


4. Twist the pony tail and then wrap it around the base, where the rubber band is. Play with it until you get the general shape that you want. 


5. Tuck the ends of the ponytail underneath the bun. Secure it by wrapping another rubber band around the bun. 


6.  Bobby pin the bun down in the front and the back. Pull it apart where it needs to be bigger. 


Done!

Bun #2

1. Section out the bang. Part the hair down the middle.


2. Pull hair into a low ponytail. Wrap the rubber band around a few times, but on the last wrap-around don't pull the hair all the way through. Pull apart the hair at the crown to create volume and texture.


3. Grab the half of the ponytail that is hanging out and wrap it around the rubber band. 


4. Bobby pin the hair around the rubber band. Adjust any pieces that look too tight, and pull down/leave out any pieces that you would like to hang down.


Done!

Bun #3

1. Pull all of the hair into a high ponytail and secure it with a rubber band. Pull out any baby hairs around the face.


2. Twist the ponytail and then wrap it around the base of the pony. 


3. Tuck the ends of the ponytail underneath the bun.


4. Wrap a second rubber band around the bun to secure it. Go in with a couple of bobby pins to attach any weird height to the base of your scalp. Pull the bun apart where it is too small. 


Done!

Bun #4


1. Part hair down the middle or on the side, wherever your natural part falls. 


2. Tuck the hair behind the ears. I try to position the hair behind my ears exactly how I want it to look when it's going to be in the bun.


3. Secure the hair into a ponytail at the nape of the neck with a rubber band.


4. Spray the sides of the head along the part with water or hairspray. I prefer water, because I hate the feel of hairspray. I use the Kristin Ess Signature Hair Water because it smells amazing and comes out in a fine mist. I use it to smooth any fly aways and give the hair a sleek look. Is my hair oily? Maybe. Or did I make it look wet on purpose? No one knows. BOOM.


5. Twist the ponytail and wrap it around the base of the rubberband. Secure with a second rubber band.


6. Secure the bun to the head using bobby pins. The more sleek, the better. No messy pieces left out on this one.


Done!

Thank you so much for reading, as always if you have any questions PLEASE don't hesitate to message me on Instagram! I live for this shit! Pick my brain any time! 

lovelovelove,
Tanner


Share:

Monday, May 6, 2019

Current Skincare Routine & Favorites

You guys, this is one of my favorite topics so excuse me if I get a little carried away. I'm aware that this whole routine is elaborate and extra, but I don't care- skincare is EVERYTHING. I'm going to try to break this down in categories of daily, nightly, bi-weekly, and weekly. See? Extra AF. But if Lauryn Evarts Bosstick from The Skinny Confidential has taught me anything, it's that people want specifics. I'm also going to post a Q & A from my esthetician at the end of this post. She also happens to be my sister, so I've definitely got the hookup when it comes to skincare.


This routine is always changing, and I'm constantly trying out new products. When I finish one I will swap it out with another. I have a couple of holy grail products that will always be part of the routine and I will make sure to let you guys know which products are here to stay. I have very sensitive skin, so everything I use is relatively gentle and natural.

Daily:


STEP 1: Cleanse
  • Every morning I cleanse my face with one of these two washes. They are both very gentle and don't cause any redness, which is a must for me since my skin turns pinkish-red so easily. The African Black Soap is a body wash that I originally bought for Blake, but I ended up loving it as a facial cleanser as well. Both of these are available at Target.


STEP 2: Tone
  • I am absolutely obsessed with this witch hazel toner from Target. This is definitely a holy grail product because it has made my skin tone so much more even and has gotten rid of a lot of pore congestion. I love the rose petal scent but I have also tried the lavender and it is amazing. I've found that my skin reacts better to natural-based products versus products that are loaded with chemicals.


STEP 3: Lymphatic drainage with a jade roller
  • This step is optional, but it is a game changer. I do this in the morning before I apply my makeup if I'm looking puffy. I am naturally pretty oily so I don't use the rosehip oil if I'm going to wear makeup, but if it's the weekend or before bed I'll use an oil. This one I picked up from Marshalls, and the jade roller is from Amazon. I will link a video on lymphatic drainage with a roller, because it's so important to do it correctly. This will instantly slim your face and make your features more defined. I've found that when I do this regularly my fine lines aren't as noticeable and I actually have a jawline LOL. This is the video that explains why a jade roller is a great tool for lymphatic drainage. You can always just use your hands, and I'll link a video for that here. This is the jade roller that I got from Amazon. 


STEP 4: Moisturize & SPF
  • Hey Tristin, are you proud of me? She is always telling me to protect my skin from the sun, and this moisturizer has SPF 30 in it. Anti aging is a pretty big deal, so this is perfect. My best friend/ makeup artist @moonchild_makeup showed this stuff to me and now it is definitely considered a holy grail product. It's not too heavy and it doesn't make my skin any oilier than it already is. It's a great primer for makeup. You can find this at ULTA or Target.
Nightly:
STEP 1: Remove makeup & cleanse 
  • Using a wash cloth and one of the face cleansers that I showed in Daily: Step 1, remove all makeup. I will NEVER sleep with makeup on, under any circumstances. I can count on one hand the amount of times I have accidentally fallen asleep with makeup on. It is a CRIME. Do you hear me, Sophia? 

STEP 2: Eye cream
  • I alternate between the Rodan & Fields eye cream and the Dermalogica, but they are both great. I am OCD about the fine lines around my eyes so I always make sure to use an eye cream before bed. In my opinion wrinkles around the eye are a positive thing because it means that you've laughed a lot, but they also age us like crazy. This is a great preventative measure, and if I start now hopefully they won't be too bad when I'm older. Both of these are available at Touch of Class Salon. 
STEP 3: Night time oil with Retinol
  • This was a MAJOR splurge for me, but I had an ULTA gift card and I've heard that serums infused with Retinol are amazing for skin tone, so I did it. So far I absolutely love it, but I'll keep you guys posted on whether or not I'll buy it again.

STEP 4: Moisturize
  • I like to do a moisturizer on top of my oils at night! Moisturizing= preventing. Any product from Pacifica is amazing, in my experience. I have tried several and I have yet to find one that I don't like. When I had eyelash extensions I used this one specifically because it is oil free and wouldn't make the extensions fall off before they were ready. You can find this at Target. 

STEP 5: Target problem areas
  • I have tried countless on the spot treatments for pimples and clogged pores and nothing has come close to drying them out like pure tea tree oil. I put a little bit of this stuff if I feel a blemish coming on and it stops it before it can get out of control. I got this oil at Target but I think next time I'm going to buy the real deal from an Essential Oils rep. I want my skincare to be as pure as possible.
Bi-Weekly

Exfoliate
  • Every two or three days I will use a scrub to get rid of any dead skin or buildup. My absolute favorite scrub is from Rodan + Fields, and it's available through our salon Touch of Class in Tulare. It is magical, but pricey. I've recently started using this African Black Soap scrub and so far I love it. It's very gentle. I usually do this in the morning before I tone or on the weekends.

Red Light Therapy
  • As many times as I'm able to during the week I go to Revive Tan & Spa in Tulare and I get in the red light therapy bed. Red light therapy is NOT a tanning bed, it's quite the opposite. It's healing. My acne scars have disappeared thanks to this bed. When I was going every other day (recommended), I saw a major reduction in joint pain and even my cellulite. Everything about red light therapy is amazing and I encourage you all to do some research on it. I got in the red light bed throughout my pregnancy and I never got any stretch marks. It could be genetics, but I think that red light therapy also had something to do with it. Also, I drank TONS of water.


Weekly


Face Mask
  • HOLY GRAIL OF ALL HOLY GRAIL PRODUCTS. I have used this mask for years and have yet to find another mask that can compete with this one. If I'm having a breakout or if I just need to get a deep clean, this is my go-to. I will link it here, but it's also available at Target now. Target, I love you.

Face Tinkling- AKA shaving my face
  • This sounds crazy, I'm aware. It's intimidating, I'm aware. Honestly though, now that I've finally decided to go for it I'm telling you I will never skip this step. I have blonde baby hairs all over my face, and even though you can't see them I didn't realize that it was making me break out along my cheeks. It was also making my bronzer go on splotchy. Since I've been doing this regularly I no longer have those problems. A few different bloggers have talked about this and have some great videos demonstrating how they do this. I will link them here and here. On the second video fast forward to 6 minutes in. 


Interview with @Tristin_the_Esthetician


Q: If you had to choose one skincare product what would you chose and why?


A: SUNSCREEN SUNSCREEN and did I mention sunscreen? I use a daily SPF of Atleast 30 (which blocks 97% of the sun’s UVB rays) It is soooo important not only to protect our skin from skin cancer but also to age gracefully. I don’t know about you but I’m trying to stay lookin good as long as I possibly can.
Q: Why are facials so good for us? How often do you recommend a facial?

A: Facials are very beneficial for a number of reasons. Each person has their own issues with their skin that a facial can address. Whether that’s acne, congestion, uneven skin tone, fine lines (the list goes on). Even if you feel like you have generally good skin a facial is still necessary. Exfoliation, extractions, hydrating mask, and a stimulating massage are all part of a basic facial that helps you keep your skin feeling healthy and looking radiant. I recommend a facial once a month. 

Q: What is your #1 piece of advice for someone who struggles with acne prone skin?

A: Ahh such a hard question. Acne can be caused by so many different things. Diet, hormones, hygiene, certain make ups or products, genetics, etc. My best piece of advice would be to eliminate or add one thing at a time so you can see how it affects your skin. I probably hear this the most: 
"IM BREAKING OUT I’M GOING TO CHANGE EVERYTHING RIGHT NOW" or "I’ve been using this for a week and see no change"
Which, yes queens and kings make those changes; but when you do it all at once you have no idea what you got rid of or added that helped or didn’t help, ya know? & your skin takes 3-4 weeks to adjust to a new product. I know, life isn’t fair. 

Tristin's product recommendations:


Cleansers: 
Tris says: "Always double cleanse, ya'll"

Night Serum:
Tris says: "Lather this all over your face at night, thank me later ;)"

Moisturizer:
Tris says: "SO MANY PEOPLE DON'T MOISTURIZE AND IT MAKES ME WANNA PUNCH THINGS" 

Thank you so much for the suggestions you guys, I'm having so much fun sharing with you all! If you have any ideas for next week, send them my way!

As always, 

lovelovelove,
Tanner


Share:
Blogger Template Created by pipdig